A concrete foundation slab is installed through a sequence of carefully managed steps — site clearing, subgrade compaction, gravel base and vapor barrier placement, formwork construction, steel reinforcement, the concrete pour itself, finishing, control joint cutting, and curing. Each step directly affects the slab's long-term structural performance, and skipping or rushing any phase creates problems that are expensive to fix once the concrete has hardened.
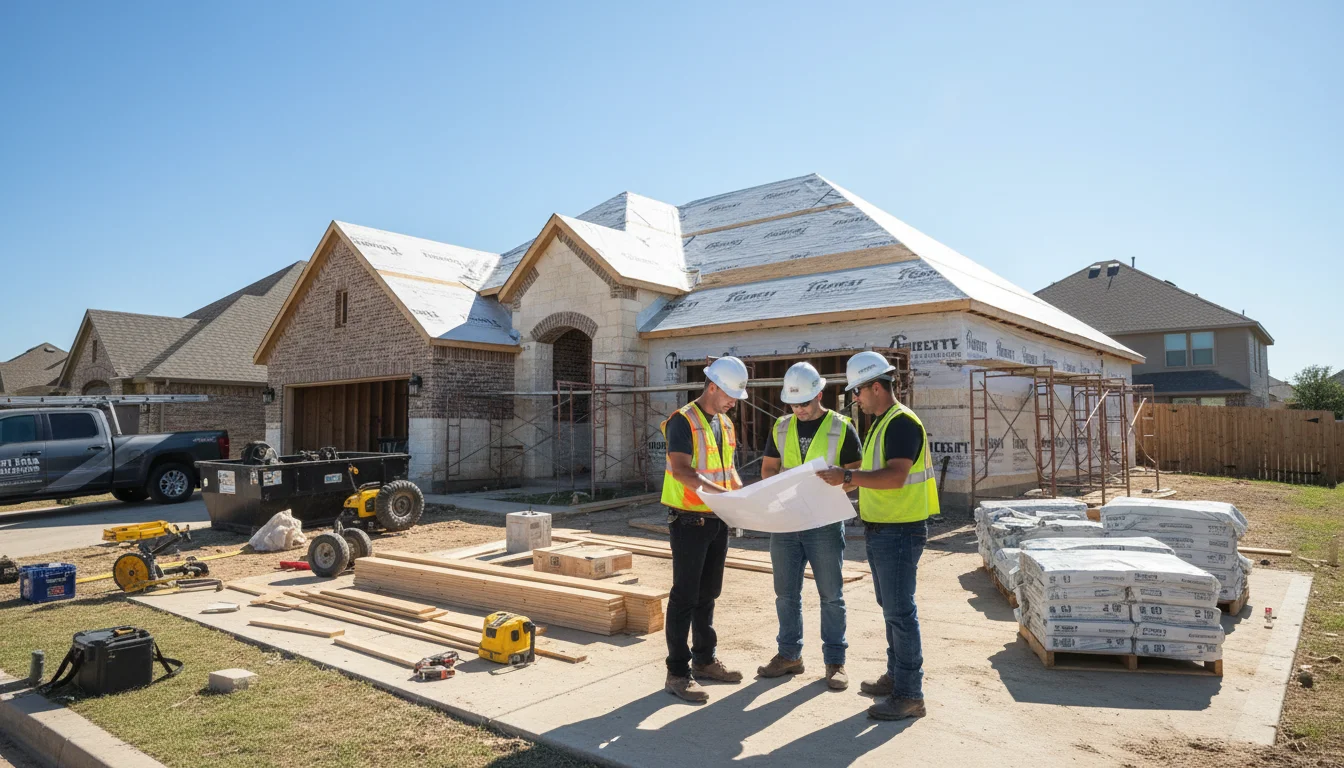
Most homeowners never see what happens before the concrete trucks show up. But the work that goes into a concrete slab installation process before a single yard of concrete is poured is what separates a foundation that lasts decades from one that cracks, settles, or fails within a few years. If you're building a new home, adding a garage, or pouring a slab for an outbuilding in Denton County, understanding this process gives you the ability to evaluate your contractor's work in real time — not after the concrete has already set. Learn more about TriStar Built's concrete foundation and slab services and why the process matters as much as the finished product.
Here's the thing. The foundation slab installation steps aren't complicated in concept, but they require precision and experience to execute correctly — especially in North Texas, where expansive clay soils add an additional layer of engineering complexity that contractors from other regions may not always account for. This guide walks you through every phase so you know exactly what a professional installation looks like from start to finish.
Before any concrete is poured, the building site must be cleared, excavated to the correct depth, graded for drainage, and compacted to create a stable subgrade. Subgrade compaction is the single most important pre-pour step — an unstable or poorly compacted subgrade leads to differential settlement, cracking, and structural failure that no amount of concrete thickness can compensate for.
Everything starts with the dirt. A professional concrete foundation contractor begins by clearing the site of vegetation, topsoil, organic material, and debris. Organic matter decomposes over time, creating voids beneath the slab that cause settling. Once cleared, the site is excavated to the engineered depth — accounting for the gravel base layer, the slab thickness, and any perimeter thickenings or turned-down footings specified in the foundation plan.
Grading comes next. The excavated area is sloped to direct surface water away from the foundation. In Denton County, where expansive clay soils absorb and hold moisture unevenly, proper grading isn't just a drainage consideration — it's a foundation protection strategy. Water pooling against or beneath a slab creates the kind of soil moisture variation that causes clay to swell and shift unpredictably.
Then comes compaction. The native soil — or imported fill material if the native soil is unsuitable — is compacted using mechanical equipment (plate compactors, jumping jacks, or roller compactors, depending on the soil type and project scale). The goal is to achieve uniform density across the entire foundation footprint so the slab is supported evenly. Soft spots or inconsistent compaction create pressure differentials that lead to cracking after the slab is loaded.
| Site Prep Step | Why It Matters | What Happens If Skipped |
| Vegetation and topsoil removal | Organic material decomposes, creating voids | Slab settles unevenly as material breaks down |
| Excavation to engineered depth | Ensures proper base thickness and slab elevation | Slab sits too high or too low relative to the structure |
| Drainage grading | Prevents water from pooling against or under the slab | Moisture causes clay soil swelling and differential movement |
| Subgrade compaction | Creates a uniform bearing surface for the entire slab | Uneven support leads to cracking and structural failure |
| Soft spot replacement | Eliminates weak zones in the subgrade | Localized settling creates stress fractures in the finished slab |

After subgrade compaction, a layer of crushed gravel is spread and compacted to improve drainage and load distribution. A polyethylene vapor barrier is placed over the gravel to prevent ground moisture from migrating up through the slab. Formwork is then constructed around the perimeter to define the slab's shape, dimensions, and thickness — including any turned-down footings or perimeter beams.
The gravel base — typically 4 to 6 inches of crushed stone — serves two purposes. It provides a stable, well-draining cushion between the subgrade and the concrete and creates a capillary break that limits how much ground moisture reaches the slab. In areas with high water tables or high clay content (common across Denton County), this gravel layer is a critical moisture-management component, not just a structural one.
On top of the gravel goes the vapor barrier — a sheet of polyethylene plastic, typically 10-mil or thicker, that blocks moisture from diffusing upward into the concrete. The American Concrete Institute recommends placing the vapor barrier directly beneath the slab for maximum moisture protection. Seams are overlapped and taped, and the barrier is extended up the interior faces of the formwork. Why does this matter? Moisture vapor migrating through a slab can cause flooring failures, adhesive breakdown, mold growth, and ongoing humidity problems inside the finished structure. A properly installed vapor barrier prevents all of that.
Formwork defines the slab's boundaries. Wooden or metal forms are set along the perimeter at the exact elevation and dimensions specified in the foundation plan. For slab-on-grade foundations, the forms also shape the perimeter thickenings — wider, deeper sections around the edges where the slab carries the heaviest structural loads from exterior walls. These turned-down footings distribute the building's weight more effectively into the soil below. Before forms are closed, plumbing lines, electrical conduits, and any in-slab utilities are roughed in and inspected — because once the concrete is poured, accessing those systems means cutting through the finished slab.
| Component | Specification | Purpose |
| Gravel base | 4–6 inches crushed stone, compacted | Drainage, load distribution, capillary break |
| Vapor barrier | 10-mil+ polyethylene, ASTM E1745 | Blocks ground moisture vapor transmission |
| Perimeter forms | Set to engineered grade and dimensions | Defines slab shape, thickness, and edge profile |
| Turned-down footings | 12–24 inches deep at perimeter | Distributes structural loads from walls to soil |
| In-slab plumbing | Positioned per plumbing plan, pressure-tested | Provides water supply and drainage beneath finished floor |
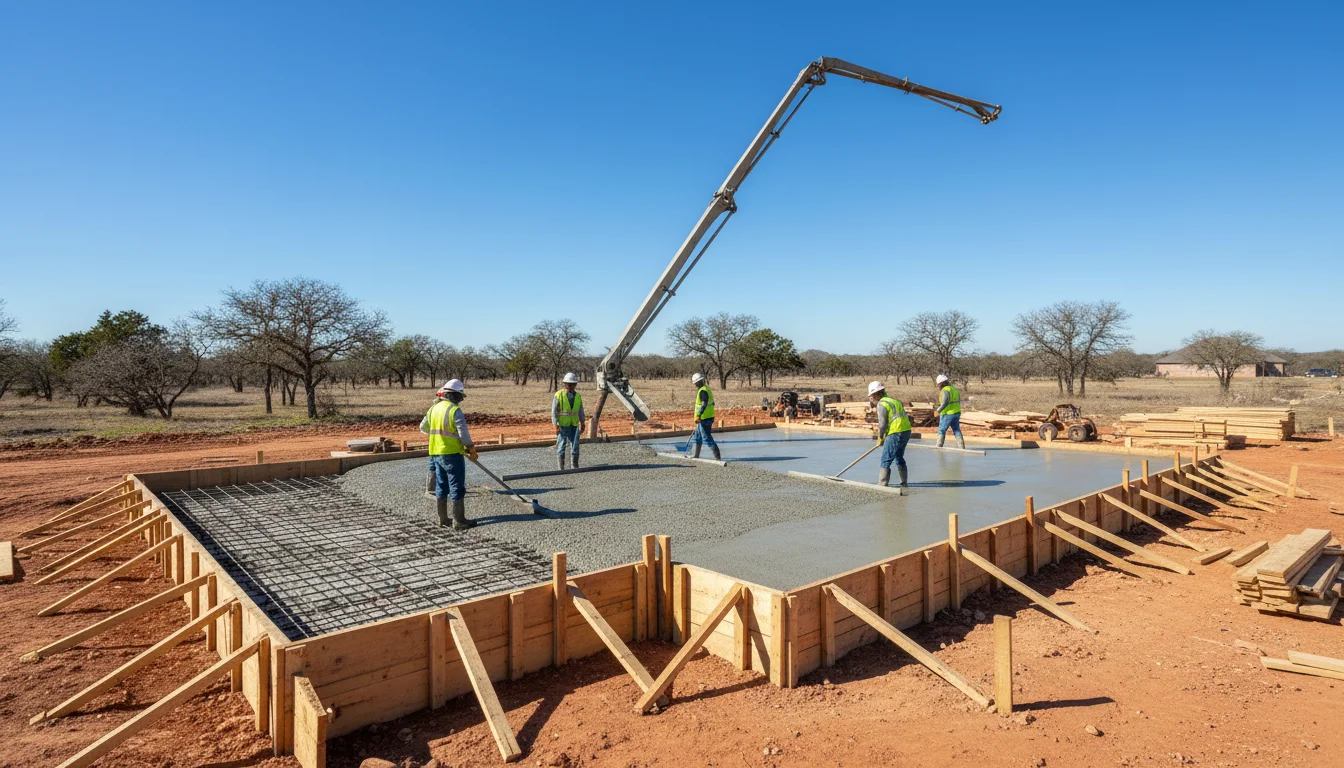
Steel reinforcement — rebar grids, wire mesh, or post-tension cables — is placed inside the formwork before the pour to give the concrete tensile strength it doesn't have on its own. The concrete is then placed in a continuous pour, screeded, vibrated to eliminate air voids, and leveled to the correct grade. A monolithic pour (completing the entire slab in one continuous operation) prevents cold joints and ensures structural continuity.
Concrete is strong in compression but weak in tension. Without reinforcement, a slab cracks under the bending forces created by soil movement, load distribution, and thermal expansion. Steel reinforcement solves that problem. The type and placement of reinforcement depend on the slab's engineered design, but the most common configurations for residential slab foundation contractors include rebar grids (typically #4 rebar on 12- to 18-inch centers), welded wire mesh for lighter-duty applications, and post-tension cable systems that are increasingly common in North Texas foundation work.
Rebar is tied into a grid pattern and supported on plastic or metal chairs to keep it positioned at the correct depth within the slab — usually near the mid-point of the slab thickness. Placement matters because reinforcement that sinks to the bottom of the pour or floats to the top doesn't do its job. Anchor bolts are set along the perimeter at specified intervals — these will later secure the wood framing to the foundation. In post-tensioning systems, high-strength steel cables are laid through the foundation in a grid pattern and tensioned after the concrete reaches initial strength, compressing the slab and significantly improving its resistance to cracking and soil movement.
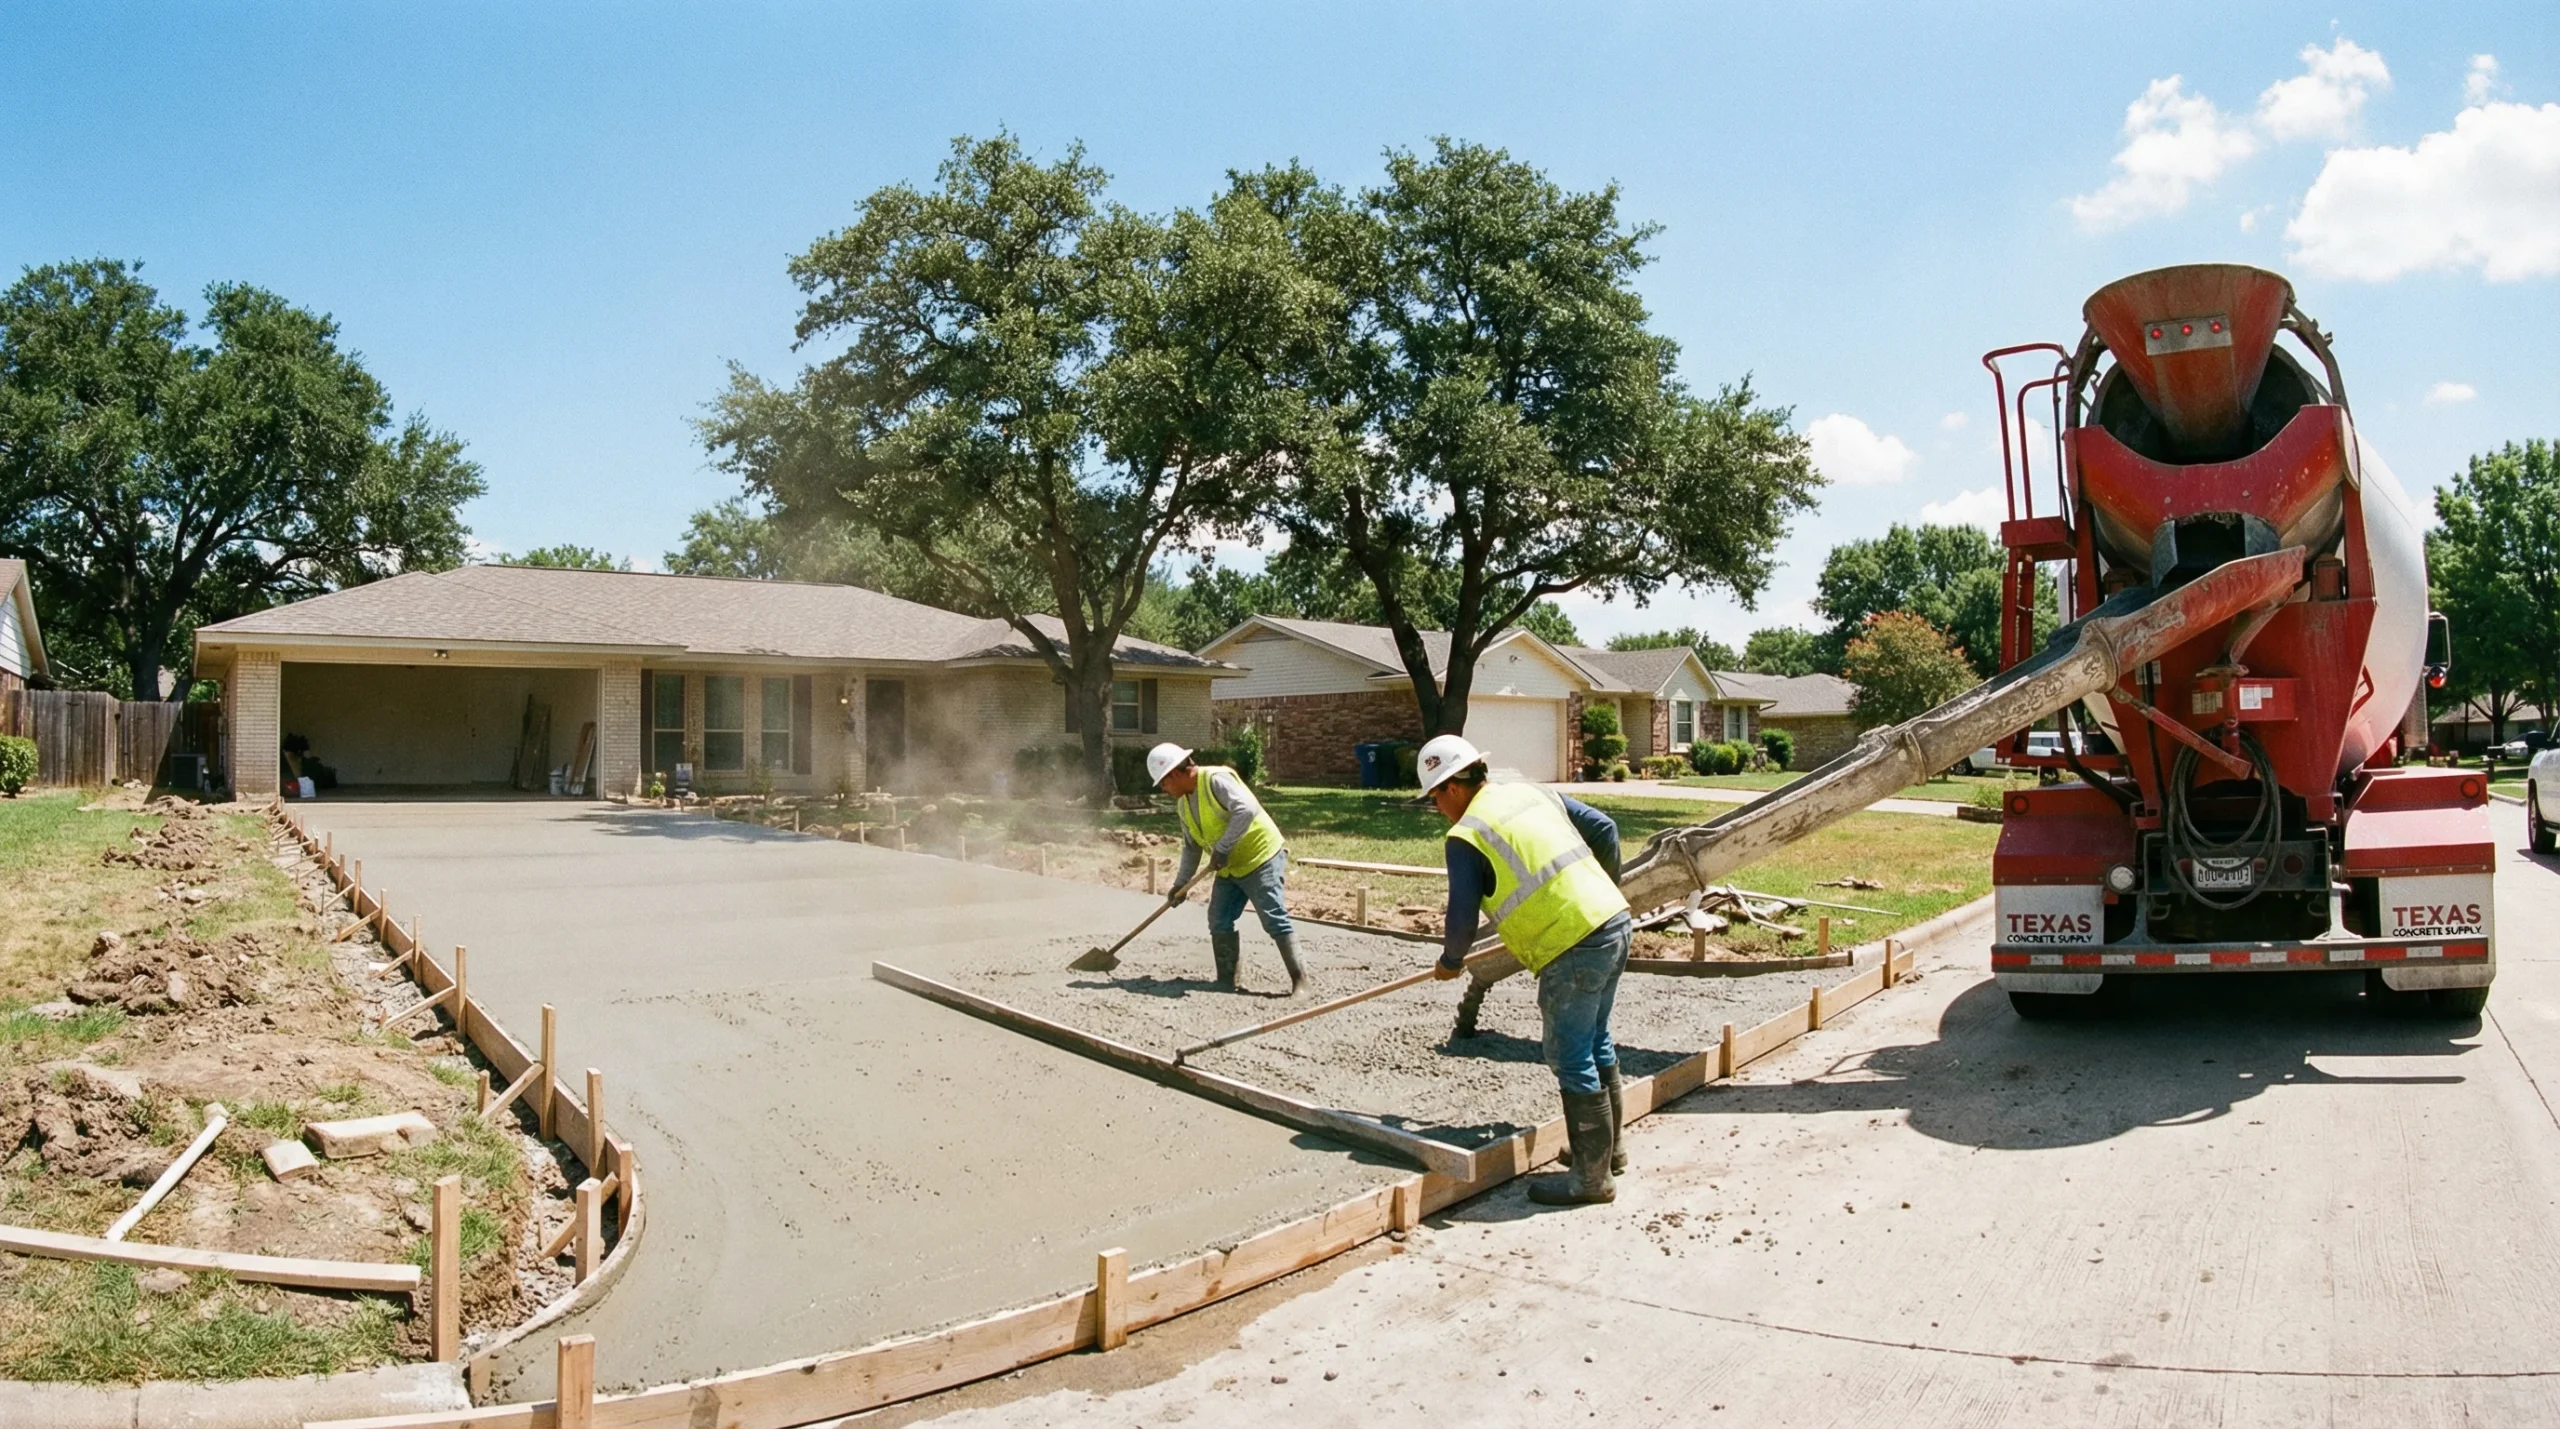
The pour itself is a coordinated operation that moves fast. Ready-mix concrete trucks deliver the material to the site, and the concrete is placed through chutes, wheelbarrows, or pumps, depending on site access. Workers spread the concrete evenly, use vibrators to consolidate it and remove trapped air pockets, and then screed the surface to level it across the forms. For residential foundation slabs, the concrete mix typically provides 3,000 to 4,000 psi compressive strength — strong enough to support the structural loads of a home while maintaining workability during placement.
The entire slab should be poured in one continuous operation whenever possible. A monolithic pour means the concrete cures as a single unified structure with no cold joints — seams where fresh concrete meets partially set concrete — which are inherent weak points. Coordinating a monolithic pour requires enough concrete trucks staged and ready, enough crew members to spread and finish the material before it begins to set, and enough daylight to complete the work. This is where experience matters. A crew that's poured hundreds of foundation slabs in North Texas knows exactly how many trucks to schedule, how fast the concrete will set in the current temperature and humidity, and how to sequence the pour for the cleanest result.
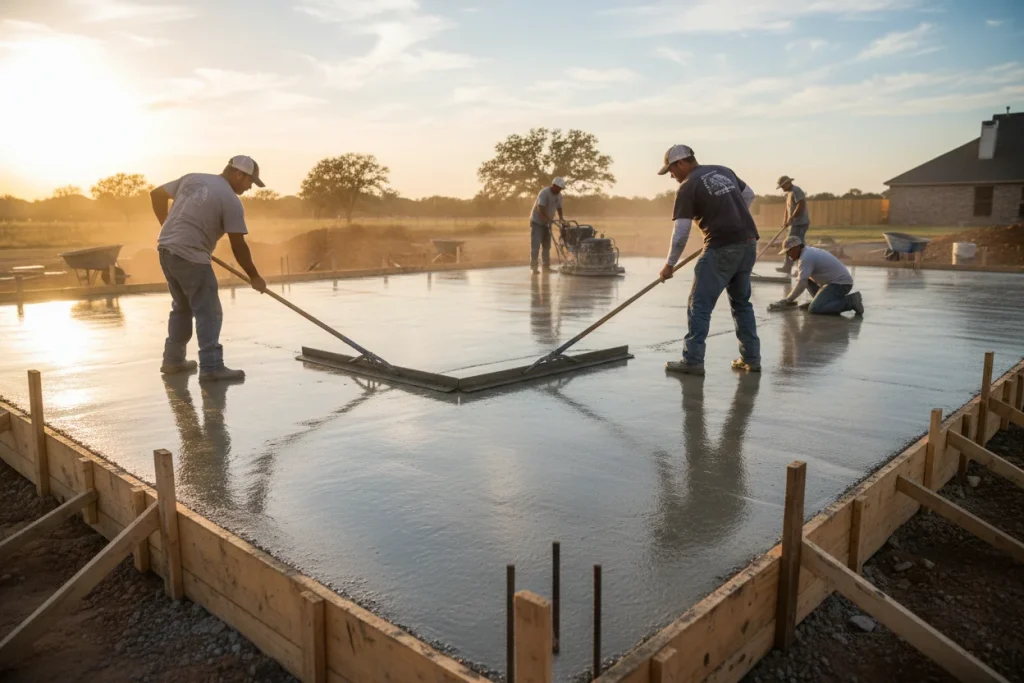
After the pour, the slab surface is finished (screeded, floated, troweled, and textured), control joints are cut within 24 hours to manage shrinkage cracking, and the slab enters a curing period of at least 7 days, during which maintaining proper moisture is essential for the concrete to reach its designed compressive strength. Concrete reaches approximately 75% of its design strength in 7 days and continues gaining strength through the 28-day mark.
Finishing starts immediately after the pour. Once the concrete is screeded level across the forms, finishers use bull floats to smooth the surface and push aggregate below the surface. As the concrete begins to set, hand troweling or power troweling creates the final surface texture. For foundation slabs that will be covered by flooring, a smooth steel-trowel finish is typical. For garage slabs or exterior applications, a broom finish provides slip resistance. The timing of each finishing step depends on how quickly the concrete sets, which varies with temperature, humidity, and mix design. In a North Texas summer where surface temperatures can exceed 100°F, the window for finishing is measured in minutes, not hours. An experienced concrete foundation company adjusts its crew size and staging to match conditions.
Control joints come next. These are shallow grooves — either tooled into the surface while the concrete is still workable or saw-cut within 12 to 24 hours after the pour — that create predetermined weak points where the slab can crack in a straight, controlled line rather than randomly. Control joints are typically spaced at intervals of 8 to 12 feet for a 4-inch slab (a common rule is 2 to 3 times the slab thickness in feet). Without them, the natural shrinkage that occurs as concrete cures produces random, jagged cracks that compromise both appearance and structural performance. Isolation joints — flexible gaps where the slab meets other structures like garage floors, porches, or sidewalks — allow independent movement and prevent stress transfer between connected slabs.
Curing is the final and most frequently underestimated step. Concrete doesn't "dry" to gain strength — it hydrates. The chemical reaction between cement and water requires sustained moisture over time to produce the crystalline structure that gives concrete its compressive strength. If the surface dries too quickly (which happens fast under North Texas sun and wind), the top layer weakens, dries, and becomes prone to surface cracking and scaling. Professional curing methods include applying liquid curing compounds that seal moisture into the surface, covering the slab with wet burlap or curing blankets, or periodic water spraying during the first 7 days. The industry standard 28-day curing period is when concrete reaches its full design strength — typically 3,000 to 4,000 psi for residential foundations. But the first 7 days are the most critical. Concrete reaches roughly 75% of its 28-day strength in that first week, which is why proper moisture maintenance during that window makes such a significant difference in the slab's long-term durability.
| Finishing & Curing Step | Timing | Purpose |
| Bull floating | Immediately after pour and screed | Smooths surface, pushes aggregate below |
| Hand or power troweling | As concrete begins initial set | Creates final surface texture and density |
| Control joint cutting | Within 12–24 hours of pour | Manages shrinkage cracking in controlled lines |
| Curing compound application | After finishing is complete | Seals moisture into the surface for proper hydration |
| 7-day initial cure period | Days 1–7 | Concrete reaches ~75% of design strength |
| 28-day full cure | Days 1–28 | Concrete reaches full design compressive strength |
TriStar Built documents every phase of the concrete slab installation process through JobTread — from site prep photos and pre-pour inspection records to pour day logs and curing documentation. That level of transparency gives you a verifiable record of exactly how your foundation was built, not just what it looks like on the surface. When you're hiring concrete slab contractors for a project in Denton County, that documentation is the difference between trusting what a contractor tells you and being able to see it for yourself.
Most residential foundation slabs take 2 to 5 days from site prep through the pour itself, followed by a 7-day initial curing period before framing can begin. The full 28-day cure continues in the background while construction proceeds above.
Subgrade compaction is the process of mechanically densifying the soil beneath the slab to create a uniformly stable base. Without proper compaction, the slab settles unevenly — causing cracks, structural stress, and problems that are nearly impossible to fix after the concrete has cured.
A properly prepared slab sits on compacted subgrade, a 4- to 6-inch gravel base for drainage, a polyethylene vapor barrier to block ground moisture, steel reinforcement (rebar or wire mesh), and formwork that defines the slab's dimensions and edge profile.
Yes. A vapor barrier — minimum 10-mil polyethylene meeting ASTM E1745 standards — prevents ground moisture from migrating up through the concrete. Without one, you risk flooring adhesive failures, mold growth, and chronic humidity problems inside the finished structure.
Rebar provides heavier-duty reinforcement for thicker slabs and higher structural loads, while welded wire mesh is suitable for standard 4-inch residential slabs with moderate loads. Both hold cracks together if they occur, but rebar provides greater tensile strength and is required for most foundation applications.
Control joints are shallow grooves cut into the slab surface that create predetermined crack lines. Concrete shrinks as it cures, and without control joints, that shrinkage produces random, uncontrolled cracking. Joints are typically spaced 8 to 12 feet apart for a 4-inch slab.
Concrete reaches approximately 75% of its design strength in 7 days, which is typically when framing can begin. Full design strength (3,000 to 4,000 psi for most residential foundations) is reached at 28 days. The first 7 days of moisture maintenance are the most critical.
A monolithic pour means the entire slab — including perimeter footings and interior floor — is poured in one continuous operation. This eliminates cold joints (seams between fresh and partially set concrete) and creates a structurally unified foundation.
Expansive clay swells when saturated and shrinks during drought, creating seasonal movement that puts stress on concrete slabs. Foundation slabs in North Texas require deeper footings, specific reinforcement strategies, and moisture management engineering that other regions don't demand.
Look for documented subgrade compaction, proper gravel base depth, continuous vapor barrier installation, correctly positioned steel reinforcement on chairs, a monolithic pour with no cold joints, timely control joint cutting, and a curing plan. A qualified contractor documents each phase — tools like JobTread provide real-time project visibility so you can verify the work yourself.
A concrete foundation slab is only as strong as the process used to install it. Every step — from subgrade compaction and gravel base preparation through reinforcement, the pour, finishing, and curing — affects the slab's structural performance for the life of the building above it. Knowing what each step involves and why it matters lets you evaluate your contractor's work as it happens, ask informed questions, and recognize when critical steps are being skipped or rushed. TriStar Built has been installing concrete foundation slabs across Denton County and North Texas since 2006 — managing every phase with the kind of documentation, communication, and regional expertise that comes from nearly two decades of building on North Texas soil. If you're planning a new home, addition, garage, or outbuilding that starts with a concrete slab, contact TriStar Built for a consultation that covers exactly what your project requires from the ground up.


Whether you’re remodeling a home, expanding a business, or starting from the ground up, TriStar Built is here to guide you every step of the way. With a focus on craftsmanship, communication, and results that last, we make the construction process clear, smooth, and worth every investment.

LOCATION: 2126 James Street, Denton, TX 76205
PHONE: (940) 381-2222
© 2025 TRISTAR BUILT - ALL RIGHTS RESERVED | WEB DESIGN & SEO BY: Authority Solutions®
