A construction project in Denton, TX follows a predictable sequence — initial consultation, design and planning, permitting, pre-construction preparation, active construction with phased trade scheduling, regular client communication, inspections, and a final walkthrough — and knowing what each phase involves eliminates the uncertainty that makes the process stressful.
Most people have never been through a major construction project. The first time you build a custom home, add a room to your house, or renovate an entire floor plan, the process feels foreign. You don't know what happens in what order, who's supposed to be on-site when, how long each phase actually takes, or what your role as the homeowner is at each stage. That uncertainty is where most of the stress comes from — not the construction itself.
This guide strips away the mystery. Whether you're planning a new build, a major remodel, a room addition, or a full-service construction project in Denton County, the phases are largely the same. Understanding them in advance lets you plan your life around the project, ask the right questions at the right time, and recognize the difference between a project that's running well and one that's heading off the rails.
The initial consultation is a two-way discovery process — your contractor assesses your property, goals, and constraints while you evaluate their communication style, knowledge, and whether they listen before they talk.
A professional construction consultation isn't a sales pitch. It's an assessment. The contractor needs to understand what you want to accomplish, evaluate the property conditions that will affect the project, and determine whether the scope, timeline, and budget align with reality. You need to determine whether this is someone you trust with a major investment and months of access to your home.
During the consultation, expect your contractor to ask detailed questions about your goals, timeline expectations, and how the finished project will be used daily. They'll walk the property to evaluate structural conditions, access points, utility locations, and any existing issues that could complicate the work. For remodels in older Denton neighborhoods, that might mean identifying knob-and-tube wiring, galvanized plumbing, or foundation settlement that needs to be addressed before new construction begins.
The consultation should also include a preliminary discussion of budget range. A quality general contractor services provider won't quote a specific number on the spot — that comes later in a formal estimate — but they should be able to tell you whether your goals and your budget are in the same conversation. If they're not, an honest contractor says so during the consultation rather than presenting a lowball estimate that balloons through change orders later.
What you should leave the consultation with: a clear sense of the contractor's process, a preliminary understanding of your project's complexity, a timeline for receiving a formal estimate, and confidence that the contractor understood what you described. If you leave confused about their process or feeling like they rushed through the visit, that's a signal.

The design and estimating phase translates your consultation conversation into a documented plan — with architectural drawings or detailed scope descriptions, an itemized estimate, a project timeline, a payment schedule, and a written contract that protects both parties.
This phase is where ideas become commitments. Everything discussed during the consultation gets formalized into documents you can review, question, and approve before any work begins. For larger projects like custom home builds or major additions, this phase includes architectural design. For remodels and smaller construction projects, it involves a detailed scope of work document that describes every element of the project with enough specificity to eliminate ambiguity.
A professional estimate is itemized — not a single lump-sum number. You should see separate line items for demolition (if applicable), structural work, framing, electrical, plumbing, HVAC, insulation, drywall, flooring, cabinetry, fixtures, finishes, permits, and project management. Each line item should include material specifications (not just "tile flooring" but the specific product, size, and installation pattern) and labor.
This level of detail serves two purposes. First, it lets you compare estimates from different contractors on an apples-to-apples basis. Second, it becomes the reference document if questions arise during construction about what was included and what wasn't.
Your contractor should provide a project timeline with start and completion dates and milestones for major phases — demolition, rough-in completion, inspection windows, finish installation, and final walkthrough. Realistic timelines include buffer for weather delays (critical in North Texas during spring storm season), material lead times, and inspection scheduling. A timeline with zero contingency built in is a timeline that will be missed.
The contract formalizes everything: scope, estimate, timeline, payment schedule, change order process, warranty terms, and dispute resolution. Read it completely. Ensure the payment schedule ties to completed milestones rather than calendar dates — you pay when work is done, not when time passes. The change order clause matters most: it should require written documentation of any scope change, including the cost and timeline impact, with your approval before the work proceeds.
| Planning Document | What It Should Contain | Why It Matters |
| Scope of work | Detailed description of every project element with material specifications | Eliminates ambiguity about what's included — prevents "I thought that was extra" disputes |
| Itemized estimate | Separate line items for each trade, material, and service | Enables apples-to-apples comparison and serves as reference during construction |
| Project timeline | Start date, phase milestones, inspection windows, completion date with buffer | Sets realistic expectations and creates accountability for progress |
| Payment schedule | Milestone-based payments tied to completed work phases | Protects you from paying ahead of completed work |
| Contract | Scope, estimate, timeline, change order process, warranty, dispute resolution | Legal protection for both parties with clear terms governing the relationship |
Permitting is the behind-the-scenes phase where your contractor submits plans to the local building department, secures the approvals required to begin work legally, and schedules the inspections that will verify code compliance at each construction milestone.
Most homeowners underestimate how much time permitting can add to a project timeline. In the City of Denton, building permits are processed through the eTRAKiT system, and review timelines vary based on project complexity and current volume. A simple remodel permit may take a week or two. A new construction permit requiring plan review by multiple departments — building, fire, utilities, and planning — can take four to six weeks or longer.
Your contractor handles the permit application, plan submission, fee payment, and any revisions the building department requests. You shouldn't need to interact with the building department directly, but you should know this phase is underway and has a real impact on your start date.
Here's what the permits actually cover and why they matter to you: they ensure the work meets the building codes adopted by your jurisdiction. In Denton, that's the 2021 International Building Codes with local amendments. The permit triggers inspection requirements at specific milestones — foundation, framing, rough-in electrical, rough-in plumbing, insulation, and final. Each inspection must pass before the next phase of work can proceed. This sequential inspection process is one of the primary quality assurance mechanisms protecting you as the homeowner.
Construction management companies that handle permitting as a standard part of their process — rather than treating it as the homeowner's responsibility — are operating at a professional level. If your contractor asks you to pull your own permits, that's a significant red flag.
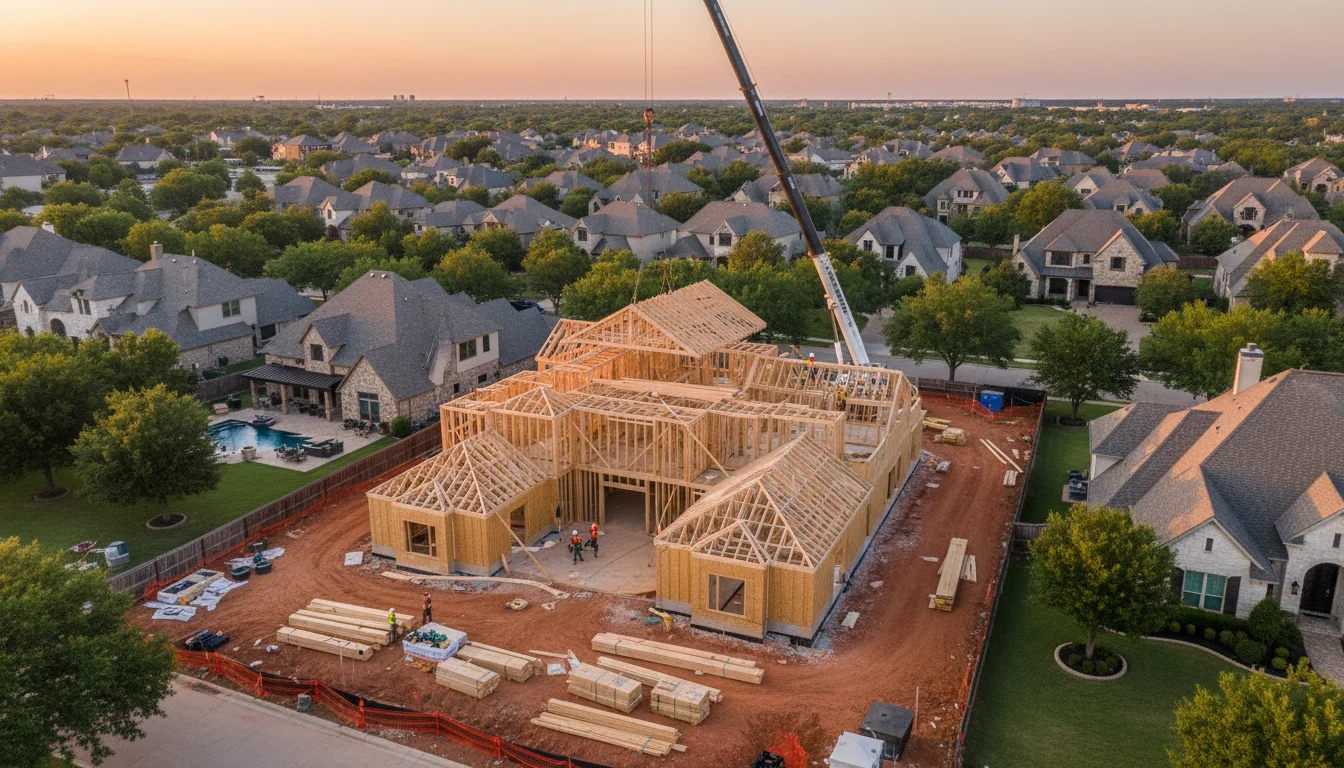
Active construction follows a structured trade sequence — demolition or site preparation first, then structural and framing work, followed by mechanical rough-ins (electrical, plumbing, HVAC), inspections, insulation, drywall, and finally the finish work that transforms the project into its completed form.
This is the phase homeowners see — and it's the longest. Active construction can range from a few weeks for a straightforward remodel to many months for a new build or major addition. Understanding the sequence helps you know where your project stands and whether it's progressing normally.
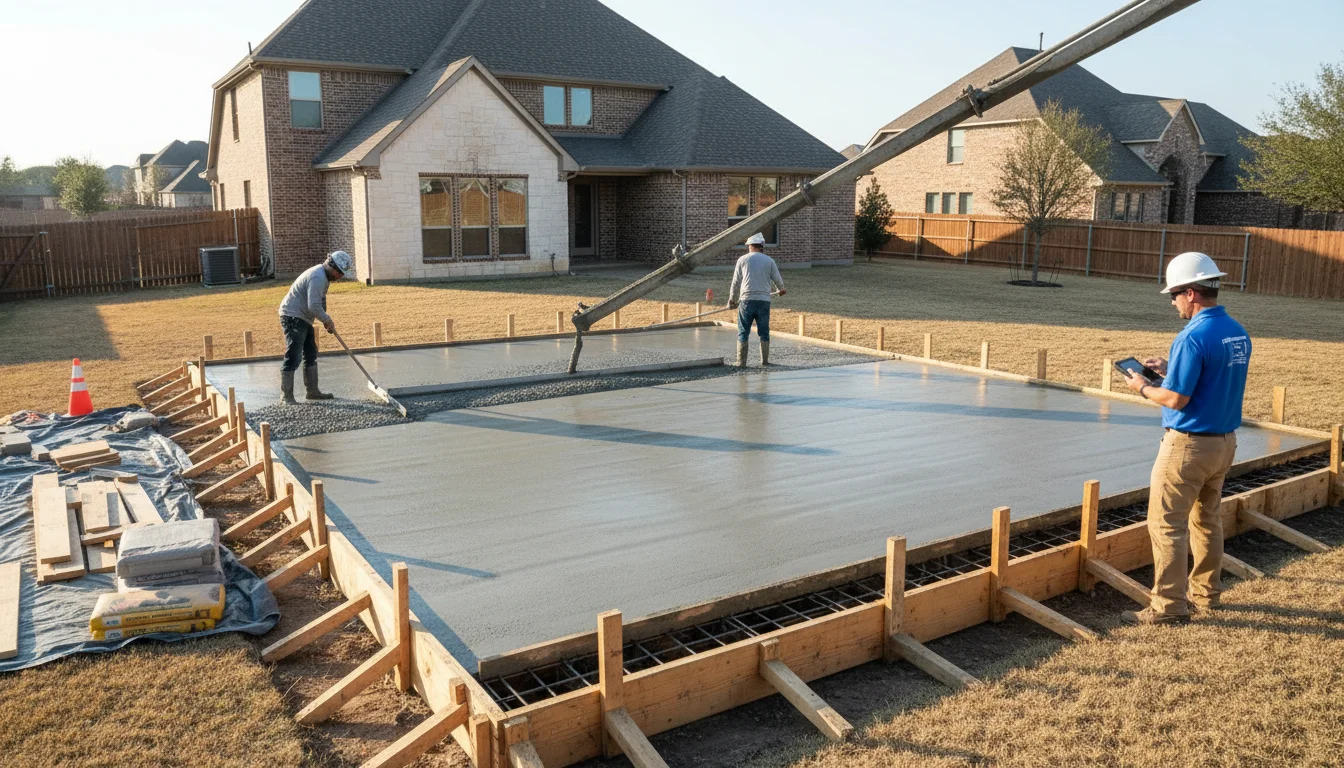
For remodels and renovations, construction begins with controlled demolition — removing the existing materials, fixtures, and finishes that the new work replaces. For new builds, site preparation includes clearing, grading, and utility rough-ins. This phase is loud, dusty, and the most disruptive. It's also fast — demolition typically takes one to five days, depending on the scope.
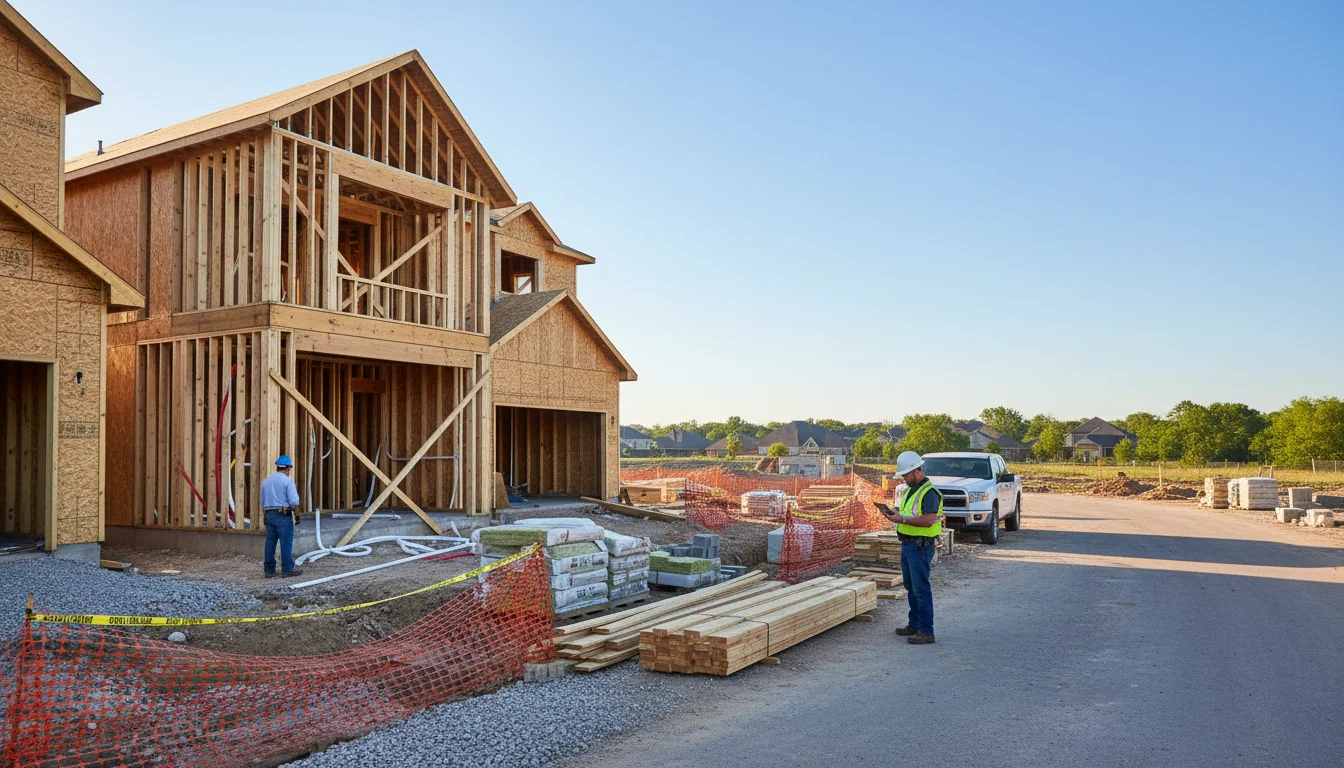
Framing defines the project's shape and structure. For additions, this means tying new framing into the existing structure — a technically demanding process that requires precision at the connection points. For new builds, framing progresses from the slab or foundation upward through walls, floor systems, and roof structure. The framing phase is when the project first starts to look like the finished product, and it's one of the most exciting milestones for homeowners.
After framing is complete and passes structural inspection, the mechanical trades come in. Electricians run wire, install boxes, and set panel connections. Plumbers run supply and drain lines. HVAC technicians install ductwork and equipment. This work happens inside the walls, floors, and ceilings before they're closed up — which is why the rough-in phase must be complete and inspected before insulation, and drywall can begin.
Each mechanical rough-in gets its own inspection from the building department. These inspections verify that wiring meets electrical code, plumbing meets plumbing code, and HVAC installation meets mechanical code. Passing these inspections before closing up walls is critical — it's the last chance to verify the work before it's hidden.
After rough-in inspections pass, insulation is installed, and the walls are closed with drywall. The drywall process — hanging, taping, mudding, sanding, and priming — takes time and requires multiple passes as the joint compound cures between coats. Patience here produces smooth, clean walls. Rushing produces visible seams and imperfections.
Once walls are finished, the project enters its final transformation. Flooring goes in. Cabinets are installed and leveled. Countertops are templated, fabricated, and installed. Tile work, backsplashes, and trim carpentry follow. Paint goes on the walls. Fixtures, hardware, and appliances are set. Each element builds on the previous one, which is why trade sequencing matters so much. A home remodeling contractor who manages this sequence poorly creates cascading delays where one late trade pushes back every trade behind it.
| Construction Phase | What Happens | Typical Duration | Key Inspection |
| Demolition / Site Prep | Removal of existing materials or site clearing and grading | 1-5 days | None typically — unless structural elements are involved |
| Structural / Framing | New walls, floor systems, roof structure, and structural connections | 1-4 weeks | Framing inspection before mechanical rough-ins begin |
| Electrical Rough-In | Wiring, boxes, and panel connections installed inside open walls | 3-7 days | Electrical rough-in inspection |
| Plumbing Rough-In | Supply lines, drain lines, and vent stacks installed | 3-7 days | Plumbing rough-in inspection |
| HVAC Rough-In | Ductwork, equipment, refrigerant lines | 3-5 days | Mechanical inspection |
| Insulation + Drywall | Wall insulation, drywall hanging, taping, mudding, sanding | 2-3 weeks | Insulation inspection before drywall |
| Finish Work | Flooring, cabinets, countertops, tile, trim, paint, fixtures | 3-6 weeks | Final building inspection |
Professional construction communication means you receive consistent, documented updates on project progress, schedule changes, budget status, and any issues that arise — through a project management platform, not just occasional phone calls.
Communication is where the homeowner's experience is made or broken. The actual construction can be technically flawless, but if you spend weeks wondering what's happening on your project, chasing your contractor for updates, or learning about problems after they've already caused delays, the experience feels chaotic regardless of the end result.
A professional construction company uses a project management platform — tools like JobTread — that gives you direct access to your project's status at any time. You should be able to see the current schedule, completed milestones, upcoming work, budget tracking against the original estimate, any change orders with their cost and impact on the timeline, progress photos, and a communication log between you and your project manager.
This doesn't mean your contractor should bombard you with daily messages. The goal is structured communication at meaningful intervals — weekly updates during slower phases, daily updates during critical phases, and immediate notification whenever something changes that affects your timeline or budget. The communication should be proactive (they tell you before you have to ask) and documented (you can reference it later if questions arise).
What poor communication looks like: you call your contractor and get voicemail. You drive by the site, and nobody's working, but no one tells you why. You discover a change was made without your approval. You find out the project is two weeks behind, even though it was "on schedule" at the last check-in. If any of this sounds familiar from past contractor experiences, you know why communication systems matter more than communication promises.
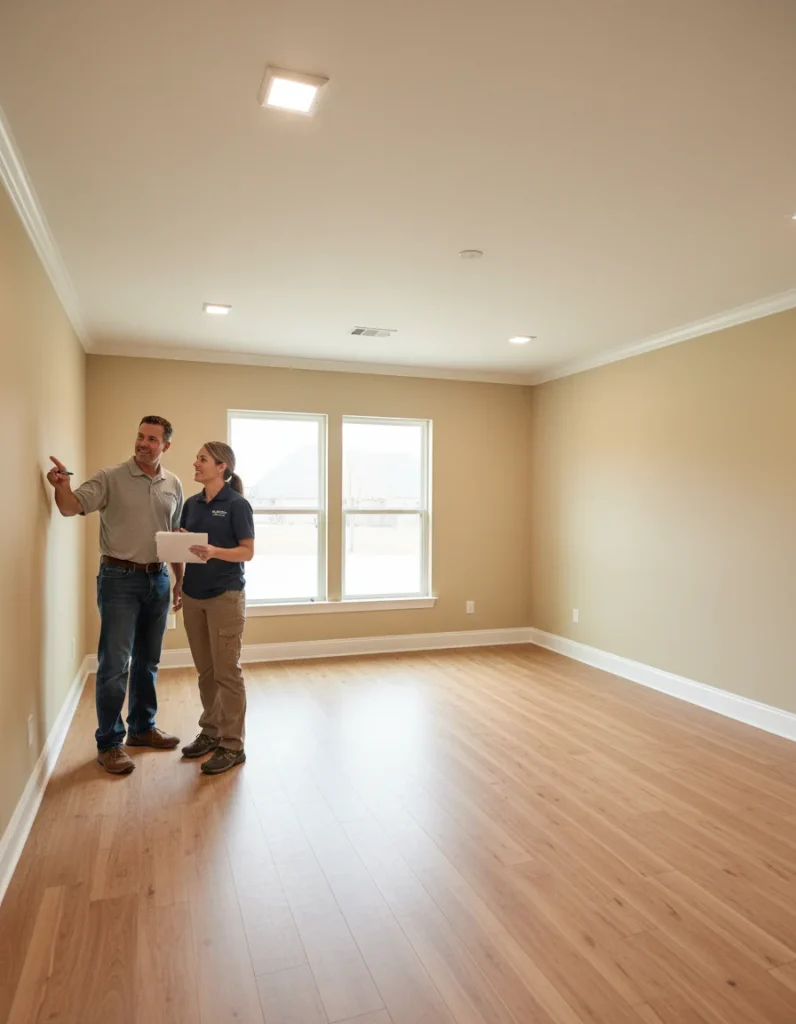
The project concludes with a final building inspection, a detailed punch-list walkthrough in which you and your contractor identify any remaining items, and a completion process that includes warranty documentation and post-project care instructions.
The finish line of a construction project isn't the last nail — it's the final walkthrough. This is the accountability phase where everything built gets evaluated against everything promised.
The building department conducts a final inspection covering all permitted work. This inspection verifies that electrical, plumbing, HVAC, structural, and finish work all meet the adopted building codes. Passing the final inspection means the jurisdiction confirms the work was built to code — an important protection for your safety and your property value.
Before or during your final walkthrough, you and your contractor create a punch list — a documented inventory of every item that needs correction, completion, or touch-up before the project is considered finished. This might include paint touch-ups, hardware adjustments, caulk gaps, trim fit issues, or any finish detail that doesn't meet the standard documented in your scope. A professionally managed project produces a short punch list. A poorly managed one produces a long one.
Every item on the punch list gets a timeline for completion. Final payment is released after the punch list is resolved and you're satisfied with the result. This is the final quality checkpoint, and it only works if both parties approach it honestly — the contractor commits to fixing legitimate issues, and the homeowner acknowledges when the work meets the agreed standard.
Your contractor should provide written warranty documentation covering both workmanship and the materials installed. Manufacturer warranties on products (appliances, roofing, flooring) are separate from the contractor's workmanship warranty — make sure you receive both. You should also receive care instructions for any materials that require specific maintenance, along with documentation of all permits, inspections, and as-built conditions for your records.
Timeline varies significantly by scope. A bathroom remodel may take four to six weeks, a kitchen remodel six to twelve weeks, a room addition two to four months, and a custom home build nine to eighteen months. Permitting, weather, and material lead times all affect the schedule.
Your contractor should visit the property, evaluate existing conditions, discuss your goals and timeline, identify potential complications, and provide a preliminary budget range. You should leave understanding their process and when to expect a formal estimate.
The City of Denton processes building permits through the eTRAKiT system. Your contractor submits plans, pays fees, and manages any revision requests. Review times range from one to six weeks depending on complexity. Permits trigger mandatory inspections at each construction milestone.
A professional estimate itemizes every component — demolition, structural work, each mechanical trade, materials with specific product names, finishes, permits, and project management. It includes a timeline with milestones and a payment schedule tied to completed work phases.
Typical inspections include foundation, framing, electrical rough-in, plumbing rough-in, mechanical (HVAC), insulation, and final. Each inspection must pass before the next construction phase can proceed. Your contractor coordinates all inspection scheduling.
Through a project management platform that gives you access to schedules, budgets, change orders, photos, and a communication log. Weekly updates during routine phases, daily during critical phases, and immediate notification when anything changes that affects timeline or budget.
A punch list is a documented inventory of items needing correction, completion, or touch-up before the project is officially finished. You and your contractor create it during the final walkthrough. Every item gets a timeline for resolution, and final payment is released after completion.
Yes, through a formal change order process. Any scope change should be documented in writing with the cost impact, timeline impact, and your written approval before the work proceeds. Verbal agreements without documentation create disputes.
You should receive a written workmanship warranty from your contractor and separate manufacturer warranties for all products installed (appliances, roofing, flooring, fixtures). Make sure you understand the duration, coverage, and claims process for each.
Through your project management platform access, you should be able to compare current progress against the original timeline and budget. Completed milestones, upcoming scheduled work, and any schedule adjustments should be visible and documented. If you have to ask whether you're on track, your communication system isn't working.
A construction project doesn't have to feel like a leap of faith. When you understand the sequence — consultation, planning, permitting, construction, communication, and completion — the process becomes predictable rather than stressful. Every phase has a purpose, every milestone has a checkpoint, and every question you have should get an honest, documented answer.The contractors who manage projects at this level aren't just building structures. They're building trust — one transparent update, one passed inspection, and one resolved punch list item at a time. If you're planning a construction project in Denton County and want to work with a team that manages every phase with this level of structure, schedule a consultation and see what professionally managed construction actually looks like.


Whether you’re remodeling a home, expanding a business, or starting from the ground up, TriStar Built is here to guide you every step of the way. With a focus on craftsmanship, communication, and results that last, we make the construction process clear, smooth, and worth every investment.

LOCATION: 2126 James Street, Denton, TX 76205
PHONE: (940) 381-2222
© 2025 TRISTAR BUILT - ALL RIGHTS RESERVED | WEB DESIGN & SEO BY: Authority Solutions®